Testing using MetaMask Part 2 "Executing the Contract"
Before writing any javascript code we first need to deploy the contract
after deploying we will need 2 things
1. The Contract address
2. The Contract ABI
In the next post i will be showing how to use the "web3 Deploy" to get the Contract Address.
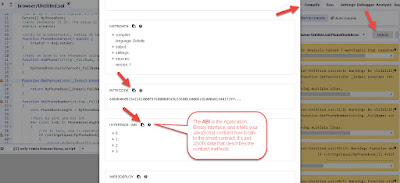 On the Remix - Solidity IDE. Make sure you are on the "Compile" Tab. Click on the "Details" Button for a popup. scroll down to see the "Interface ABI". (Not needed if you are using Remix IDE)


 Click the "Create" to see a popup Window Requesting for the Transaction. Click "Submit" to Accept the transaction. You will need to wait a minimum of 15 Seconds. In my case i waited for 1Minute
 After the transaction is create you should see the Block on Remix IDE

Open MetaMask under the "Sent" Tab you should see the transaction and you can Click on it. to open the "Blockchain Explorer"
after deploying we will need 2 things
1. The Contract address
2. The Contract ABI
In the next post i will be showing how to use the "web3 Deploy" to get the Contract Address.


Deploy the contract using the "Web3 Deploy" to get the Contract Address (Not needed if you are using Remix IDE)

Make sure you have Remix IDE open with MetaMask. You will notice the Account Number and number of Ether match. Make sure you have selected "Injected Web3"


Comments
Post a Comment